Help:Crash Course: Difference between revisions
(Created page with "Editing a wiki is easy! To begin, start writing content and save it when you're done. Once you're comfortable, read the page below for info on formatting, to gradually learn a...") |
|||
| (9 intermediate revisions by the same user not shown) | |||
| Line 1: | Line 1: | ||
Editing a wiki is easy! To begin, start writing content and save it when you're done. Once you're comfortable, read the page below for info on formatting, to gradually learn about the advanced features that you can use on | Editing a wiki is easy! To begin, start writing content and save it when you're done. Once you're comfortable, read the page below for info on formatting, to gradually learn about the advanced features that you can use on WikiMSK. | ||
If you run into any questions that this guide cannot solve, you can always | If you run into any questions that this guide cannot solve, you can always contact [[User:Jeremy]] | ||
== Formatting pages == | == Formatting pages == | ||
There are two main methods used to edit pages: | There are two main methods used to edit pages: | ||
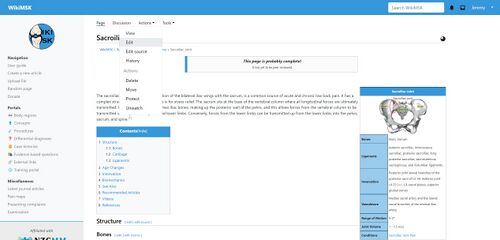
# The visual editor | |||
# The source editor. | |||
For new users, especially for those without previous experience in using markup, the visual editor will be the most straightforward and simplest option. For 90% of things the visual editor is sufficient. However, knowing how to use both will help you edit better pages as you can more accurately work with more intricate features. | |||
Other than increased complexity, the other main downside to using the source editor is that you can't use the Citoid software which is the easiest way to auto-generate referencing by just plugging in the DOI or PMID. You can however use another system to auto-generate references with PMIDs (not DOIs) which is outlined in [[Help:References]]. | |||
== Visual editor == | |||
The visual editor is a WYSIWYG (''what you see is what you get'') tool to edit pages on MediaWiki. To use it you simply need to click Actions and then ''Edit'', which will change the view and allow you to change text styles, formatting, add citations, tables and symbols, among other things. Apart from the regular text formatting (bold, italics), some useful things to add to an article are the following: | |||
The visual editor | |||
There are some keys you need to rely on within the visual text editor | There are some keys you need to rely on within the visual text editor | ||
*The first of these is the | *The first of these is the will say '''Paragraph''' or '''Heading'''. If you click on this, a drop-down menu will open and you’ll be able to change the text to paragraph or various different headings | ||
* | *Next to paragraph, you will find the options that allow you to choose between '''bold, italics, and many other settings like underline''' | ||
* | *Next to this is '''links''', recognizable by the classic icon in the shape of a paper clip. By clicking on it, you can create two types of links: on the left side, you will have the chance to link to another WikiMSK entry, while on the right you will have the possibility to link it to an external address. | ||
* | *The cite button gives you a few options. The first tab lets you put in a PMID or DOI and it will autogenerate the reference. The second tab is if you want to put the reference in manually (I suggest using "basic form" for everything which is much easier to use than the specific journal/textbook versions). The third tab lets you reuse references. | ||
*Further along is the '''list tool''', which allows you to make bulleted or numbered lists, insert images, tables or others, and the one with special characters, with which you can insert characters in the text that are not present in your keyboard. | |||
*Next is Insert, for inserting images and the like. You can upload your own work directly from here. However if it is a creative commons or public domain work then please use the "Upload file" link on the left of the site which lets you choose the license. You can then come back and add it in (you'll need to reload the page). | |||
*Finally there is symbols. | |||
<gallery widths="500" heights="300"> | |||
File:Visual editor location.jpg|Visual editor button location | |||
File:Visual editor view.jpg|Visual editor view | |||
</gallery> | |||
== Source editor== | == Source editor== | ||
MediaWiki sites (such as Wikipedia, Wikia, or | MediaWiki sites (such as Wikipedia, Wikia, or WikiMSK) use wikitext to format its pages. The source editor can be activated by clicking ''Edit source'' which sits under the ''Edit'' button in the actions tab. | ||
The source editor will allow you to either type the symbols for wikitext or by selecting the text and using the formatting bar above the edit box — selecting B to format it as bold, for example. To see what a button does, hover your mouse over each button to get you acquainted with each option. As you get used to wikitext, you'll find yourself formatting the text directly. | The source editor will allow you to either type the symbols for wikitext or by selecting the text and using the formatting bar above the edit box — selecting B to format it as bold, for example. To see what a button does, hover your mouse over each button to get you acquainted with each option. As you get used to wikitext, you'll find yourself formatting the text directly. | ||
| Line 55: | Line 38: | ||
=== Wikitext cheatsheet === | === Wikitext cheatsheet === | ||
These are just some of the possible ways to format text using wikitext. Use this section as a useful reference as you edit more pages on | These are just some of the possible ways to format text using wikitext. Use this section as a useful reference as you edit more pages on WikiMSK. | ||
| Line 205: | Line 188: | ||
=== Internal links (wikilinks) === | === Internal links (wikilinks) === | ||
Here are some variations of two important types of links in | Here are some variations of two important types of links in WikiMSK: internal links to other pages in the wiki — including [[#Files|files]] (such as pictures) and external links to other websites. To add an internal link, enclose the name of the page you want to link to in double square brackets. When you save the page, you'll see the new link pointing to your page. If the page already exists, it will be displayed in blue, while empty pages are displayed in [[Help:Red Links|red]]. | ||
As you click on an internal link, the first letter is automatically capitalized and spaces are turned into underscores (typing an underscore in the link has the same effect as typing a space, but is not recommended). Always make sure to follow [[Help: | As you click on an internal link, the first letter is automatically capitalized and spaces are turned into underscores (typing an underscore in the link has the same effect as typing a space, but is not recommended). Always make sure to follow [[Help:Page Naming|proper naming]] for all pages, since links are case sensitive and might direct you to a missing page due to a different capitalization. | ||
{| class="wikitable" width="100%" style="margin: 0 auto;" | {| class="wikitable" width="100%" style="margin: 0 auto;" | ||
| Line 216: | Line 199: | ||
|- | |- | ||
| Internal link | | Internal link | ||
| <tt><nowiki>[[ | | <tt><nowiki>[[Gluteal Tendinopathy]]</nowiki></tt> | ||
| [[ | | [[Gluteal Tendinopathy]] | ||
|- | |- | ||
| Piped link | | Piped link | ||
| <tt><nowiki>[[ | | <tt><nowiki>[[Gluteal Tendinopathy|Greater Trochanteric Pain Syndrome]]</nowiki></tt> | ||
| [[ | |[[Gluteal Tendinopathy|Greater Trochanteric Pain Syndrome]] | ||
|} | |} | ||
=== External links === | === External links === | ||
External links are in the form <nowiki>[ | External links are in the form <nowiki>[https://www.example.org link name]</nowiki> (resulting in [https://www.example.org link name]), with the link name separated from the URL by a space. Links without link names will be numbered: <nowiki>[https://www.example.org]</nowiki> is simply a number [https://www.example.org]. Links with no square brackets will be displayed in their entirety: https://www.example.org. | ||
{| class="wikitable" width="100%" style="margin:0 auto" | {| class="wikitable" width="100%" style="margin:0 auto" | ||
| Line 234: | Line 217: | ||
|- | |- | ||
| External link | | External link | ||
| <tt><nowiki> | | <tt><nowiki>https://mediawiki.org</nowiki></tt> | ||
| [https://mediawiki.org http://mediawiki.org] | | [https://mediawiki.org http://mediawiki.org] | ||
|- | |- | ||
| External link, different title | | External link, different title | ||
| <tt><nowiki>[ | | <tt><nowiki>[https://mediawiki.org MediaWiki]</nowiki></tt> | ||
| [https://mediawiki.org MediaWiki] | | [https://mediawiki.org MediaWiki] | ||
|- | |- | ||
| External link, unnamed | | External link, unnamed | ||
| <tt><nowiki>[ | | <tt><nowiki>[https://mediawiki.org]</nowiki></tt> | ||
| [https://mediawiki.org] | | [https://mediawiki.org] | ||
|- | |- | ||
| Interwiki link for Wikipedia and | | Interwiki link for Wikipedia and | ||
| <tt><nowiki>[[Wikipedia: | | <tt><nowiki>[[Wikipedia:Medicine]]</nowiki></tt> | ||
| [[Wikipedia:Medicine|Wikipedia:Meidcine]] | |||
| | |||
|- | |- | ||
| Superscript for Wikipedia links | | Superscript for Wikipedia links | ||
| <tt><nowiki>{{w|target pagename}}</nowiki></tt>. | | <tt><nowiki>{{w|target pagename}}</nowiki></tt>. | ||
<tt><nowiki> | <tt>Auckland<nowiki>{{w|Auckland, New Zealand}}</nowiki></tt> | ||
| Lira{{w| | | Lira{{w|Auckland, New Zealand}} | ||
|} | |} | ||
=== Inline HTML and CSS === | === Inline HTML and CSS === | ||
Some HTML tags (and inline CSS as well) are allowed in | Some HTML tags (and inline CSS as well) are allowed in WikiMSK, for example <tt><nowiki><code></nowiki></tt>, <tt><nowiki><div></nowiki></tt>, <tt><nowiki><span></nowiki></tt> and <tt><nowiki><font></nowiki></tt>. If you know enough HTML, this will come in handy as you edit pages. We encourage you, however, to stick with wikitext as much as possible to preserve content integrity over time and to make it as portable as possible. | ||
== Attaching files == | == Attaching files == | ||
WikiMSK encourages using supporting media to make content more informative, especially media that supports multilingual learning. A great variety of file types are allowed on WikiMSK: documents, presentations, videos, vector images, audio, and photographs, for example. Here are some instructions and guidelines on including media on your page. | |||
=== Uploading === | === Uploading === | ||
Before uploading, please ensure that the content is owned by you or have legal rights to upload and redistribute it in a way that grants the same rights to the community. | Before uploading, please ensure that the content is owned by you or have legal rights to upload and redistribute it in a way that grants the same rights to the community. WikiMSK uses the CC BY-SA license as a default but welcomes content with other copyleft licenses such as GNU GPL (see [[Help:Creative Commons]] and [[WikiMSK:Copyrights]] and for more information on our approach to licensing). | ||
;Here is what you need to know about uploading files: | ;Here is what you need to know about uploading files: | ||
| Line 270: | Line 252: | ||
;For photos: | ;For photos: | ||
:Reduce photo sizes to less than | :Reduce photo sizes to less than 2MB to help us save disk space. | ||
:The preferred formats are JPEG for photographs and PNG for technical drawings. | :The preferred formats are JPEG for photographs and PNG for technical drawings. | ||
:Also, make sure to rotate the images to the proper orientation. | :Consider using tools like [https://compressjpeg.com/ Compress JPEG Images Online] or [https://compresspng.com/ Compress PNG Images Online] to reduce the file size. | ||
:Also, make sure to rotate the images to the proper orientation if it is a photo. | |||
;To upload any file: | ;To upload any file: | ||
:Click on the [[Special:Upload]] link located | :Click on the [[Special:Upload]] link located on the left of the website. | ||
:Click the "Browse..." button on the "Upload file" page, and select the file on your computer. | :Click the "Browse..." button on the "Upload file" page, and select the file on your computer. | ||
:Select the destination name of your file. Ensure that the filename is original (if not, add the date to the start of the filename). | :Select the destination name of your file. Ensure that the filename is original (if not, add the date to the start of the filename). | ||
:Choose the appropriate license. | |||
:Enter a summary (this step is optional but will be useful for others who view the file in the future). | :Enter a summary (this step is optional but will be useful for others who view the file in the future). | ||
:The summary section is a great place to indicate how you obtained the file (if you created it or attribute the original author). | :The summary section is a great place to indicate how you obtained the file (if you created it or attribute the original author). | ||
| Line 287: | Line 271: | ||
===Embedding content=== | ===Embedding content=== | ||
If you have uploaded videos or documents to other platforms such as YouTube or Google Docs, you can get an embed code that will show on | If you have uploaded videos or documents to other platforms such as YouTube or Google Docs, you can get an embed code that will show on WikiMSK pages. We don't have a strict policy that encourages or admonishes using embed codes, so you are free to consider whether to do so by considering the following possibilities. | ||
; Things to consider before embedding files | ; Things to consider before embedding files | ||
: External sites sometimes break or become unavailable over the years. Once a site goes down or accounts are closed, content is usually lost for good. | : External sites sometimes break or become unavailable over the years. Once a site goes down or accounts are closed, content is usually lost for good. | ||
: Many sites do not allow users to download the content; this might become increasingly difficult due to legal restrictions around web scraping. | : Many sites do not allow users to download the content; this might become increasingly difficult due to legal restrictions around web scraping. | ||
: External hosting is useful for files too large to be stored on | : External hosting is useful for files too large to be stored on WikiMSK (e.g., using YouTube or Vimeo to store videos). | ||
: Sometimes it is possible to reduce the file size by switching formats. | : Sometimes it is possible to reduce the file size by switching formats e.g. by using the Windows software tool Handbrake, or an equivalent tool on Mac. | ||
=== Avoid huge image files === | === Avoid huge image files === | ||
Huge image files should be avoided, as they can make pages load slowly. This is an accessibility issue to consider especially for remote or underdeveloped areas. Usually, the file should be compressed to | Huge image files should be avoided, as they can make pages load slowly. This is an accessibility issue to consider especially for remote or underdeveloped areas. Usually, the file should be compressed to 2 MB or less, even for a very large or detailed picture. Photos from digital cameras can be bigger than 5 MB, which is often unnecessarily large.An image editing tool can help you resize it. To learn more about file types and file size calculation, please reference: https://en.wikipedia.org/wiki/Image_file_formats | ||
An image editing tool can help you resize it. | |||
To learn more about file types and file size calculation, please reference: https://en.wikipedia.org/wiki/Image_file_formats | |||
== Images == | == Images == | ||
:{{main|Help:Images}} | :{{main|Help:Images}} | ||
This section describes the image markup language, i.e. the set of "markers" (rules or conventions, coded expressions) to add images, illustrations, and graphics to | This section describes the image markup language, i.e. the set of "markers" (rules or conventions, coded expressions) to add images, illustrations, and graphics to WikiMSK pages. After having uploaded an image (of your creation or an open-source license image), you can insert it by referencing the filename as an internal link, for example: | ||
<tt><nowiki>[[Image:File.png | thumb | caption]]</nowiki></tt> | <tt><nowiki>[[Image:File.png | thumb | caption]]</nowiki></tt> | ||
| Line 335: | Line 299: | ||
|- | |- | ||
| Image only | | Image only | ||
| <tt><nowiki>[[Image: | | <tt><nowiki>[[Image:Posterior_Hip_Muscles.png]]</nowiki></tt> | ||
| [[Image: | | [[Image:Posterior_Hip_Muscles.png|link=Special:FilePath/Posterior_Hip_Muscles.png]] | ||
|- | |- | ||
| Thumbnailed image | | Thumbnailed image | ||
| <tt><nowiki>[[Image: | | <tt><nowiki>[[Image:Posterior_Hip_Muscles.png|thumb]]</nowiki></tt> | ||
| [[Image: | | [[Image:Posterior_Hip_Muscles.png|thumb|link=Special:FilePath/Posterior_Hip_Muscles.png]] | ||
|- | |- | ||
| Captioned thumbnail | | Captioned thumbnail | ||
| <tt><nowiki>[[Image: | | <tt><nowiki>[[Image:Posterior_Hip_Muscles.png|thumb|Fig 1: Cleaning out the old filter]]</nowiki></tt> | ||
| [[Image: | | [[Image:Posterior_Hip_Muscles.png|thumb|Fig 1: Cleaning out the old filter|link=Special:FilePath/Posterior_Hip_Muscles.png]] | ||
|- | |- | ||
| Captioned thumbnail with center alignment | | Captioned thumbnail with center alignment | ||
| <tt><nowiki>[[Image: | | <tt><nowiki>[[Image:Posterior_Hip_Muscles.png|thumb|center|Fig 1: Cleaning out the old filter]]</nowiki></tt> | ||
| [[Image: | | [[Image:Posterior_Hip_Muscles.png|thumb|center|Fig 1: Cleaning out the old filter|link=Special:FilePath/Posterior_Hip_Muscles.png]] | ||
|} | |} | ||
See also | See also a much more detailed page at [[wikipedia:Wikipedia:Picture tutorial]], with many options. | ||
== Galleries == | == Galleries == | ||
{{main|Help:Images#Galleries}} | {{main|Help:Images#Galleries}} | ||
Image galleries are a great way to organize images on a grid | Image galleries are a great way to organize images on a grid. To include a gallery, you can either add one through visual editor (Insert -> Images and media) or through the source editor. For wiki text you need to wrap your image insertions with the <tt><nowiki><gallery></gallery></nowiki></tt> tags. For example: | ||
<pre> | <pre> | ||
| Line 365: | Line 329: | ||
== Video == | == Video == | ||
Videos can be embedded by adding them through the same way as images in the visual editor or source editor. | |||
For adding youtube videos you can using the youtube template in visual edito, or in source editor enclose the link between <nowiki><youtube></youtube></nowiki>. For example: | |||
<nowiki><youtube>https://youtu.be/jnpshtyvWr0</youtube></nowiki> | |||
==Other editing tools== | ==Other editing tools== | ||
| Line 375: | Line 343: | ||
== See also == | == See also == | ||
* [[Help:Contents|WikiMSK Help Section]] | |||
* [[Help: | |||
=== Wikipedia tutorials === | === Wikipedia tutorials === | ||
| Line 390: | Line 356: | ||
*[[mw:Help:Contents]] | *[[mw:Help:Contents]] | ||
== References == | |||
{{Article derivation|article-link=https://www.appropedia.org/Help:Editing|article=Help:Editing|author=Appropedia|license-link=https://creativecommons.org/licenses/by-sa/4.0/|license=CC-BY-SA}} | |||
[[Category:Help]] | [[Category:Help]] | ||
{{Help footer}} | |||
Latest revision as of 19:25, 9 July 2022
Editing a wiki is easy! To begin, start writing content and save it when you're done. Once you're comfortable, read the page below for info on formatting, to gradually learn about the advanced features that you can use on WikiMSK.
If you run into any questions that this guide cannot solve, you can always contact User:Jeremy
Formatting pages
There are two main methods used to edit pages:
- The visual editor
- The source editor.
For new users, especially for those without previous experience in using markup, the visual editor will be the most straightforward and simplest option. For 90% of things the visual editor is sufficient. However, knowing how to use both will help you edit better pages as you can more accurately work with more intricate features.
Other than increased complexity, the other main downside to using the source editor is that you can't use the Citoid software which is the easiest way to auto-generate referencing by just plugging in the DOI or PMID. You can however use another system to auto-generate references with PMIDs (not DOIs) which is outlined in Help:References.
Visual editor
The visual editor is a WYSIWYG (what you see is what you get) tool to edit pages on MediaWiki. To use it you simply need to click Actions and then Edit, which will change the view and allow you to change text styles, formatting, add citations, tables and symbols, among other things. Apart from the regular text formatting (bold, italics), some useful things to add to an article are the following:
There are some keys you need to rely on within the visual text editor
- The first of these is the will say Paragraph or Heading. If you click on this, a drop-down menu will open and you’ll be able to change the text to paragraph or various different headings
- Next to paragraph, you will find the options that allow you to choose between bold, italics, and many other settings like underline
- Next to this is links, recognizable by the classic icon in the shape of a paper clip. By clicking on it, you can create two types of links: on the left side, you will have the chance to link to another WikiMSK entry, while on the right you will have the possibility to link it to an external address.
- The cite button gives you a few options. The first tab lets you put in a PMID or DOI and it will autogenerate the reference. The second tab is if you want to put the reference in manually (I suggest using "basic form" for everything which is much easier to use than the specific journal/textbook versions). The third tab lets you reuse references.
- Further along is the list tool, which allows you to make bulleted or numbered lists, insert images, tables or others, and the one with special characters, with which you can insert characters in the text that are not present in your keyboard.
- Next is Insert, for inserting images and the like. You can upload your own work directly from here. However if it is a creative commons or public domain work then please use the "Upload file" link on the left of the site which lets you choose the license. You can then come back and add it in (you'll need to reload the page).
- Finally there is symbols.
Visual editor button location
Visual editor view


Source editor
MediaWiki sites (such as Wikipedia, Wikia, or WikiMSK) use wikitext to format its pages. The source editor can be activated by clicking Edit source which sits under the Edit button in the actions tab.
The source editor will allow you to either type the symbols for wikitext or by selecting the text and using the formatting bar above the edit box — selecting B to format it as bold, for example. To see what a button does, hover your mouse over each button to get you acquainted with each option. As you get used to wikitext, you'll find yourself formatting the text directly.
Wikitext (or wiki markup) consists of normal characters like asterisks, single quotes or equation marks which have a special function in the wiki, sometimes depending on their position. For example, to format a word in italic, you include it in two single quotes, for example, by typing text ''like this''.
Wikitext cheatsheet
These are just some of the possible ways to format text using wikitext. Use this section as a useful reference as you edit more pages on WikiMSK.
| These work anywhere on a page | ||||||
|---|---|---|---|---|---|---|
| Description | You type | You get | ||||
| Italics | ''italic'' |
italic | ||||
| Bold | '''bold''' |
bold | ||||
| Bold and italic | '''''bold & italic''''' |
bold & italic | ||||
| Big | <big>BIG</big> |
BIG | ||||
| Small | <small>small</small> |
small | ||||
| Colored text (list.) | <font color="DarkOrchid">colored text</font> |
colored text | ||||
| Escape wiki markup | text with no ''markup'' |
no ''markup'' | ||||
| Signature (use to sign your comments) | ~~~~ |
User:Lonny (talk) 23:37, May 18 2024 (UTC) | ||||
| These work at the beginning of the line only | ||||||
| Description | You type | You get | ||||
| Headings (Heading 1 is used only automatically for the page title) |
==Heading 2== ===Heading 3=== ====Heading 4==== =====Heading 5===== |
Heading 2 Heading 3 | ||||
| Horizontal line (use sparingly) |
---- |
| ||||
| Bullet list |
*one *two *three |
| ||||
| Numbered list |
#one #two #three |
| ||||
| Definition list |
;Definition :item 1 :item 2 |
| ||||
| Preformatted text |
a space at the beginning of the line creates preformatted text |
a space at the beginning of the line creates preformatted text | ||||
| Tables. See Help:Tables and Help:Table examples for more details. |
{| border="1" style="color:Crimson;
|-
| This
| Is
|-
| A
| Table
|}
|
| ||||
Internal links (wikilinks)
Here are some variations of two important types of links in WikiMSK: internal links to other pages in the wiki — including files (such as pictures) and external links to other websites. To add an internal link, enclose the name of the page you want to link to in double square brackets. When you save the page, you'll see the new link pointing to your page. If the page already exists, it will be displayed in blue, while empty pages are displayed in red.
As you click on an internal link, the first letter is automatically capitalized and spaces are turned into underscores (typing an underscore in the link has the same effect as typing a space, but is not recommended). Always make sure to follow proper naming for all pages, since links are case sensitive and might direct you to a missing page due to a different capitalization.
| Description | You type | You get |
|---|---|---|
| Internal link | [[Gluteal Tendinopathy]] | Gluteal Tendinopathy |
| Piped link | [[Gluteal Tendinopathy|Greater Trochanteric Pain Syndrome]] | Greater Trochanteric Pain Syndrome |
External links
External links are in the form [https://www.example.org link name] (resulting in link name), with the link name separated from the URL by a space. Links without link names will be numbered: [https://www.example.org] is simply a number [1]. Links with no square brackets will be displayed in their entirety: https://www.example.org.
| Description | You type | You get |
|---|---|---|
| External link | https://mediawiki.org | http://mediawiki.org |
| External link, different title | [https://mediawiki.org MediaWiki] | MediaWiki |
| External link, unnamed | [https://mediawiki.org] | [2] |
| Interwiki link for Wikipedia and | [[Wikipedia:Medicine]] | Wikipedia:Meidcine |
| Superscript for Wikipedia links | {{w|target pagename}}.
Auckland{{w|Auckland, New Zealand}} |
LiraW |
Inline HTML and CSS
Some HTML tags (and inline CSS as well) are allowed in WikiMSK, for example <code>, <div>, <span> and <font>. If you know enough HTML, this will come in handy as you edit pages. We encourage you, however, to stick with wikitext as much as possible to preserve content integrity over time and to make it as portable as possible.
Attaching files
WikiMSK encourages using supporting media to make content more informative, especially media that supports multilingual learning. A great variety of file types are allowed on WikiMSK: documents, presentations, videos, vector images, audio, and photographs, for example. Here are some instructions and guidelines on including media on your page.
Uploading
Before uploading, please ensure that the content is owned by you or have legal rights to upload and redistribute it in a way that grants the same rights to the community. WikiMSK uses the CC BY-SA license as a default but welcomes content with other copyleft licenses such as GNU GPL (see Help:Creative Commons and WikiMSK:Copyrights and for more information on our approach to licensing).
- Here is what you need to know about uploading files
- Make sure to locate the file on your computer that you will upload.
- We strongly recommend using open, editable file formats
- For photos
- Reduce photo sizes to less than 2MB to help us save disk space.
- The preferred formats are JPEG for photographs and PNG for technical drawings.
- Consider using tools like Compress JPEG Images Online or Compress PNG Images Online to reduce the file size.
- Also, make sure to rotate the images to the proper orientation if it is a photo.
- To upload any file
- Click on the Special:Upload link located on the left of the website.
- Click the "Browse..." button on the "Upload file" page, and select the file on your computer.
- Select the destination name of your file. Ensure that the filename is original (if not, add the date to the start of the filename).
- Choose the appropriate license.
- Enter a summary (this step is optional but will be useful for others who view the file in the future).
- The summary section is a great place to indicate how you obtained the file (if you created it or attribute the original author).
- To finish the upload, press the "Upload file" button. You will have to wait, depending on your Internet connection.
- Once your file is uploaded, you will probably want to put it on your page. This is done by adding [[File:Filename]] to the text.
Please note that others may edit your uploads (and admins may delete them) if necessary. Also, any attempts to abuse the system may get you blocked from uploading.
Embedding content
If you have uploaded videos or documents to other platforms such as YouTube or Google Docs, you can get an embed code that will show on WikiMSK pages. We don't have a strict policy that encourages or admonishes using embed codes, so you are free to consider whether to do so by considering the following possibilities.
- Things to consider before embedding files
- External sites sometimes break or become unavailable over the years. Once a site goes down or accounts are closed, content is usually lost for good.
- Many sites do not allow users to download the content; this might become increasingly difficult due to legal restrictions around web scraping.
- External hosting is useful for files too large to be stored on WikiMSK (e.g., using YouTube or Vimeo to store videos).
- Sometimes it is possible to reduce the file size by switching formats e.g. by using the Windows software tool Handbrake, or an equivalent tool on Mac.
Avoid huge image files
Huge image files should be avoided, as they can make pages load slowly. This is an accessibility issue to consider especially for remote or underdeveloped areas. Usually, the file should be compressed to 2 MB or less, even for a very large or detailed picture. Photos from digital cameras can be bigger than 5 MB, which is often unnecessarily large.An image editing tool can help you resize it. To learn more about file types and file size calculation, please reference: https://en.wikipedia.org/wiki/Image_file_formats
Images
- Main article: Help:Images
This section describes the image markup language, i.e. the set of "markers" (rules or conventions, coded expressions) to add images, illustrations, and graphics to WikiMSK pages. After having uploaded an image (of your creation or an open-source license image), you can insert it by referencing the filename as an internal link, for example:
[[Image:File.png | thumb | caption]]
For instance, if you just uploaded a file named AEFprevfilt2.jpg, you can insert it by typing [[Image:AEFprevfilt2.jpg where is the image filename, thumb is a parameter for the default formatting of the image, and caption is the short text that describes its content. The following table will describe some of the options that you may use to format your images.
| Description | You type | You get |
|---|---|---|
| Image only | [[Image:Posterior_Hip_Muscles.png]] | 
|
| Thumbnailed image | [[Image:Posterior_Hip_Muscles.png|thumb]] | |
| Captioned thumbnail | [[Image:Posterior_Hip_Muscles.png|thumb|Fig 1: Cleaning out the old filter]] | |
| Captioned thumbnail with center alignment | [[Image:Posterior_Hip_Muscles.png|thumb|center|Fig 1: Cleaning out the old filter]] |
See also a much more detailed page at wikipedia:Wikipedia:Picture tutorial, with many options.
Galleries
- Main article: Help:Images#Galleries
Image galleries are a great way to organize images on a grid. To include a gallery, you can either add one through visual editor (Insert -> Images and media) or through the source editor. For wiki text you need to wrap your image insertions with the <gallery></gallery> tags. For example:
<gallery mode=nolines widths=200>
Image:image_name01|caption01
Image:image_name02|caption02
</gallery>
Video
Videos can be embedded by adding them through the same way as images in the visual editor or source editor.
For adding youtube videos you can using the youtube template in visual edito, or in source editor enclose the link between <youtube></youtube>. For example:
<youtube>https://youtu.be/jnpshtyvWr0</youtube>
Other editing tools
Page history
Every page allows you to view the history of edits. This allows you to undo any changes that you have done to a page, and even to revert the page back in time to a previous version.
Diffs
Diffs are pages that show the differences between page revisions in a wiki page. A diff page shows two columns with the text removed on the left and text added on the right and the more recent revision of the page displayed below the columns. To view a diff, go to the History tab, select two revisions and click "Compare selected revisions".
See also
Wikipedia tutorials
- Wikipedia:How to edit a page
- Wikipedia:Help:Contents/Editing Wikipedia.
- Help pages on Wikipedia
- Table help from Wikipedia
- Wikipedia's How to edit a page
MediaWiki tutorials
References
Part or all of this article or section is derived from Help:Editing by Appropedia, used under CC-BY-SA

